Online Help

System Contents
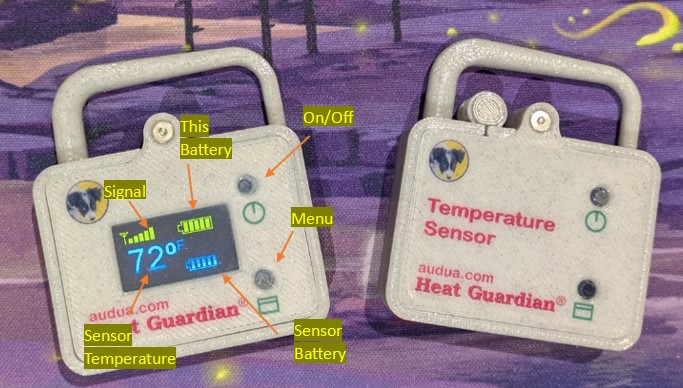
The Heat Guardian system consists of two units - a sensor and a monitor.
The Temperature Sensor
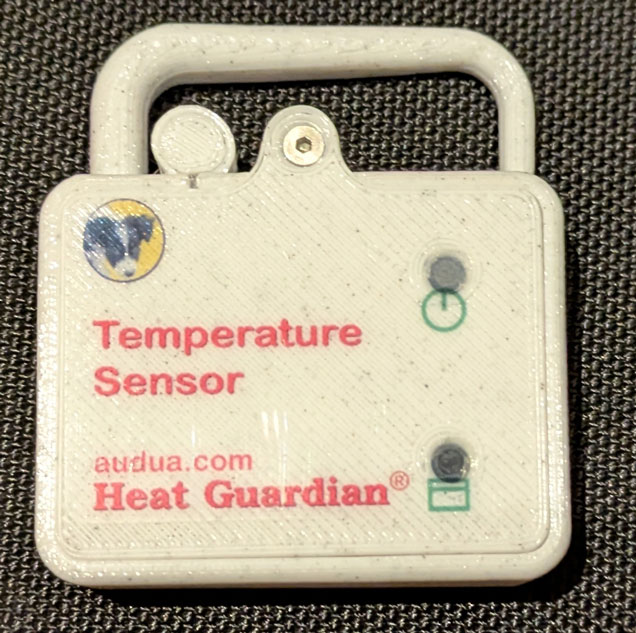
The sensor is the unit without a display that says "Temperature Sensor" on it. Although it has two buttons, only the top button - the power button - is normally used. The lower button is only used if you have to do a firmware update.

The Monitor
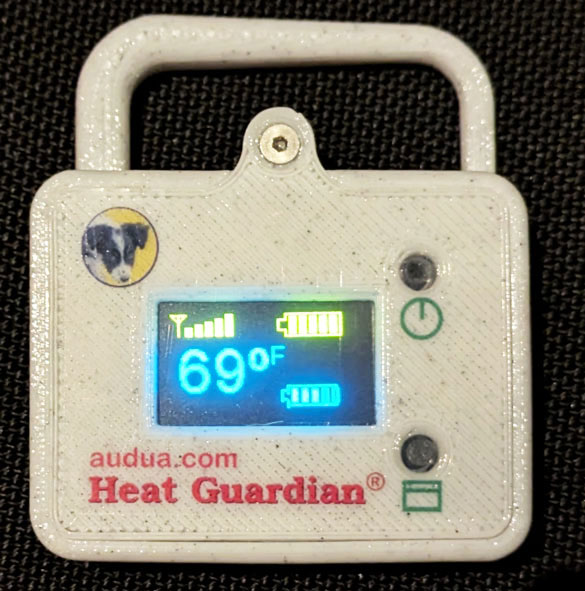
The monitor is the unit with a display. The top button is for turning power on and off and the bottom button is used for changing monitor parameters - such as maximum temperature before alerting.
The display shows the sensor temperature and battery in blue. It shows the monitor battery and radio signal levels in yellow.

How to Turn it On
How to Turn it Off
The Monitor Display and Buttons

How to Charge the System
How Long does a Charge Last?
A fully charged sensor unit will go about 60 hours (7 days) before needing to be recharged. The monitor unit - which uses more power for the monitor - will go about 40 hours (5 days) without a recharge.
How Long does a Battery Last?
The lithium-polymer battery is rated at about 500 charge cycles before it degrades. This would equate to about 5 years of daily use, 10 years of weekly use, or 40 years if you use the unit once a month. The battery is factory replaceable.
Placing the sensor and monitor
To get the longest range
The antenna of the Heat Guardian is in the handle. Try to ensure that the signal passes through windows and not metal or concrete walls.
For best signal it's good to keep the monitor and sensor upright and if you need every foot of range the monitor antenna/handle may be angled to be perpendicular to the sensor. The monitor will alert you with a red error light if the connection is lost for 2 minutes. By default, the units talk to each other every 30 seconds.
If you really want to know... click the power button twice (while on) to see a numeric signal level value.

To get the most accurate temperature readings
The thermal sensor chip is in the cage just below the handle. Ensure that it has a good airflow and do not put the sensor in direct sunlight. If, instead of worrying about your pet, you are obsessively checking the sensor accuracy or using the sensor as a thermometer, be aware that it may take up to 30 minutes to fully adjust to ambient temperature for 1°C accuracy.
We have at least one customer who keeps a Heat Guardian in her office so she can send comments to HR about the current room temperature.
We sometimes leave it in the refrigerator for an hour to ensure our refrigerator is on-temperature.
What are the Heat Guardian error/warning conditions?
In cases of errors or warnings the Heat Guardian will typically change the blinking LED color and play an alert sound.
* If the blinking LED is GREEN then everything is working perfectly, and the temperature is within your set range.
The unit has the following error conditions:
- If the temperature is too high or too low the blinking LED will be RED and an alert will sound every 30 seconds (for a few minutes) unless muted by clicking a button. Too high = greater than the set maximum temperature, and too low = lower than the set minimum temperature.
- If the temperature measurement is changing rapidly, indicating that ambient temperature is pretty far off from the measured temperature, the blinking LED will be ORANGE and an alert will sound. This is after a constantly increasing (or decreasing) temperature for about 3 minutes. Simply placing a room-temperature sensor into a warm car will cause this - don't panic but let the measurement stabilize.
- If the sensor signal is lost for 2 minutes the LED will stay RED and an alert will sound every 10 seconds until muted by clicking a button. After a bit the temperature will blank out to show it is not up to date and a counter will show how long it has been since the last packet reception.
Loss of signal for up to a minute may happen when nearby devices (such as some garage door openers or ZWave light switches) use the Heat Guardian frequency range.
Heat Guardian Parameters
Click the menu (bottom) button to scroll through the settable parameters. Click the power button once and the monitor will then use top/bottom buttons as up/down on the parameter value. To save a value just wait a few seconds and the display will return to the usual temperature display and the value is saved.
Min Temp - Minimum Temperature
Set the minimum temperature so that if the sensor temperature drops below this value the light will blink red and an alert will sound. While the system will tolerate a quite low temperature, using batteries below 0 degrees F is not recommended.
Max Temp - Maximum Temperature
Set the maximum temperature so that if the sensor temperature rises above this value the light will blink red and an alert will sound. While the system will tolerate a quite high temperature, using batteries above 140 degrees F is not recommended.
Units
Select between Fahrenheit and Celsius.
Volume - Speaker Volume
The volume may be set between 0 (silent) and 100 (pretty loud). The default volume is 50 on the monitor (25 on the sensor). If the unit starts alerting you with an annoying tune repeatedly - which it WILL do when temperature goes out of range - click either button to mute the sound temporarily.
LED Bright - Blinking LED Brightness
The blinking LED brightness can be set between 0 (off) and 100 (quite bright). The default brightness is 50 on the monitor and 25 on the sensor.
Screen Brt - Screen Brightness
The monitor display brightness can be set to any of Off, Low, Medium, or High. The lower the brightness the longer the battery will last. We specify battery charge life based on a display setting of medium. If you set the display to Off it will still go on when you click a button to set parameters (so you can see what you're doing).
